Deploying a Stand-Alone Application - Chapter 11
In this chapter, we will learn how to deploy an application using the Kubernetes WebUI and CLI. We will expose the application with a NodePort Service.
- Deploy an application from the dashboard.
- Deploy an application from a YAML file using kubectl.
- Expose a service using NodePort.
- Access the application from outside the Minikube cluster.
We will start the minikube dashboard.
$ minikube start

$ minikube dashboard
Running this command will open up a browser with the Kubernetes Web UI. By default, the dashboard is connected to the default Namespace. All operations will be performed inside the default namespace.
In case the browser is not opening a tab try access the dashboard on this url, your port may vary.
http://127.0.0.1:37751/api/v1/namespaces/kubernetes-dashboard/services/https:kubernetes-dashboard:/proxy/.
Deploy a webserver using the nginx image
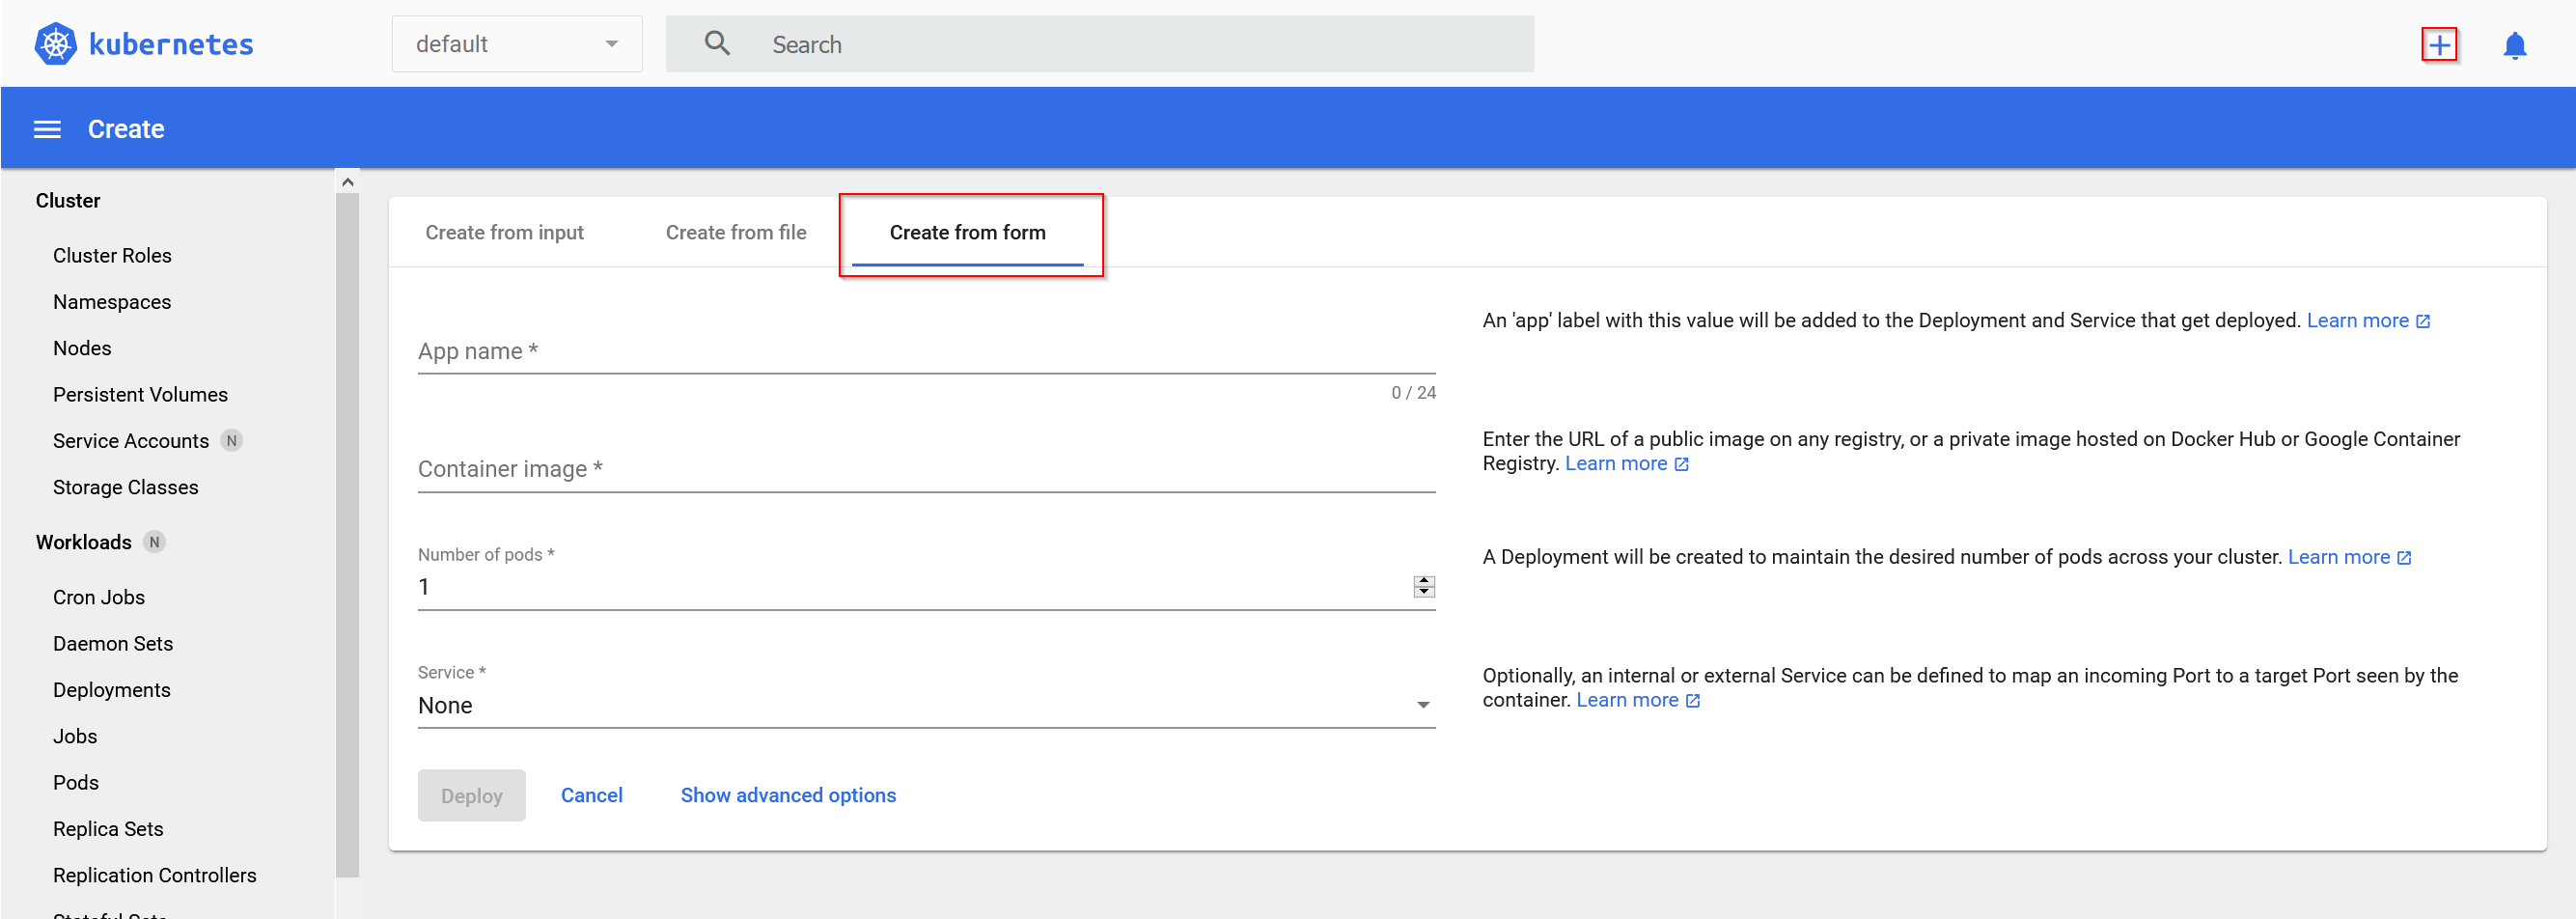
From the dashboard we can access the create interface, by clicking on the '+' icon. We will use the Create from form tab to create our application.
Fill out the App name field, we are using web-dash. The docker image we are going to use is nginx. We'll set up 1 Pod, and define the Service field as External, with the exposed port defined as 8080 and the target port as 80.
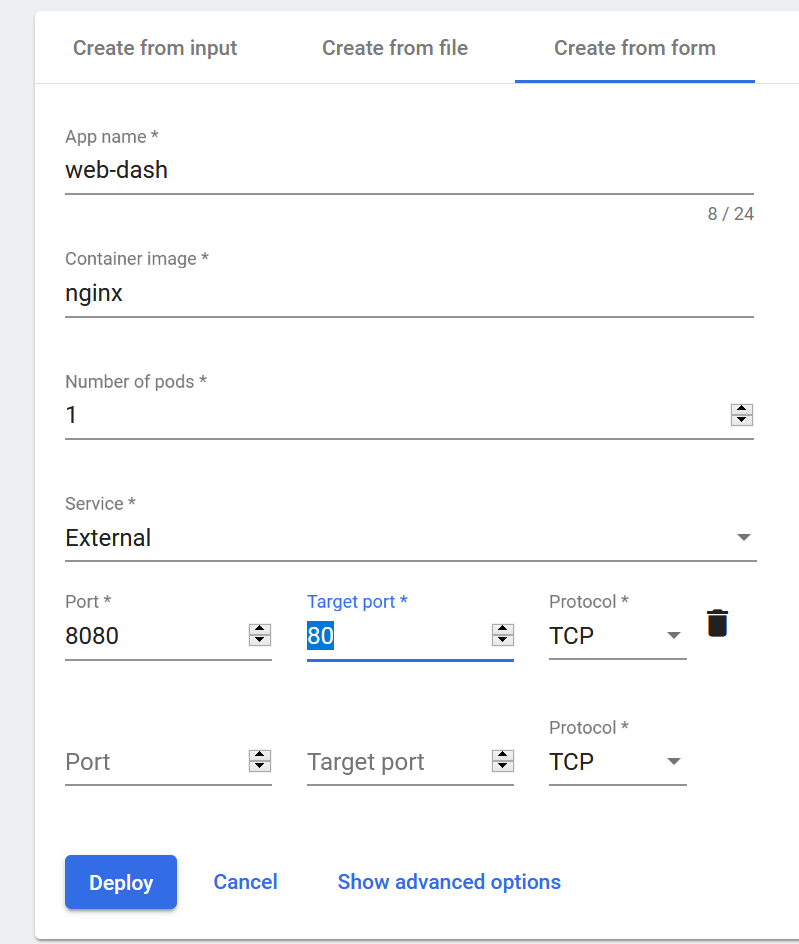
In the Advanced options, we can specify options such as Labels, Namespace, etc. By clicking on the Deploy button, we are going to trigger a deployment. As expected, we see a Deployment named web-dash in the default namespace. It will create a ReplicaSet, which eventually will create a Pod with the default k8s-app: web-dash label.
The resources displayed by the Dashboard match one-to-one resources displayed from the CLI via kubectl.
We list the Deployment.
$ kubectl get deploy
NAME       READY   UP-TO-DATE   AVAILABLE   AGE
web-dash   1/1     1            1           4m6s
We list the ReplicaSet
$ kubectl get rs
NAME                  DESIRED   CURRENT   READY   AGE
web-dash-7797d85794   1         1         1       4m46s
And also list the Pods
$ kubectl get pods
NAME                        READY   STATUS    RESTARTS   AGE
web-dash-7797d85794-rrqt2   1/1     Running   0          5m34s
Let us also look at the labels and selectors, which play an important role in ligcally grouping a subset of objects to perform operations.
Look at a Pod's Details, by using the same name as listed by kubectl get pods
$ kubectl describe pod
Name:         web-dash-7797d85794-rrqt2
Namespace:    default
Priority:     0
Node:         minikube/192.168.237.232
Start Time:   Tue, 12 Jan 2021 20:28:23 +0100
Labels:       k8s-app=web-dash
              pod-template-hash=7797d85794
Annotations:  <none>
Status:       Running
IP:           172.17.0.5
IPs:
  IP:           172.17.0.5
Controlled By:  ReplicaSet/web-dash-7797d85794
Containers:
  web-dash:
    Container ID:   docker://dfda29f03732b43da02904faaba5a874f355d653e2eb35a976a5beb67344c7cb
    Image:          nginx
    Image ID:       docker-pullable://nginx@sha256:10b8cc432d56da8b61b070f4c7d2543a9ed17c2b23010b43af434fd40e2ca4aa
    Port:           <none>
    Host Port:      <none>
    State:          Running
      Started:      Tue, 12 Jan 2021 20:28:37 +0100
    Ready:          True
    Restart Count:  0
...
We will focus on the Labels field, where we have a Label set to k8s-app=web-dash, while the is much more Information about the Pod.
List the pods, along with their attached Labels
With the -L option we can add extra columns in the output to list Pods with their attached Label keys and their values.
$ kubectl get pods -L k8s-app,label2
NAME                        READY   STATUS    RESTARTS   AGE   K8S-APP    LABEL2
web-dash-7797d85794-rrqt2   1/1     Running   0          12m   web-dash
Select the Pods with a given Label
With the -l option we are selecting all the Pods that have the k8s-app Label key set to value web-dash
$ kubectl get pods -l k8s-app=web-dash
NAME                        READY   STATUS    RESTARTS   AGE
web-dash-7797d85794-rrqt2   1/1     Running   0          15m
Deploy a Webserver using the CLI
We are going to deploy an application using the CLI next, let us first delete the Deployment we created.
$ kubectl delete deploy web-dash
deployment.apps "web-dash" deleted
It will also delete the ReplicaSet and the Pods it created.
$ kubectl get rs

No resources found in default namespace.

$ kubectl get pods

No resources found in default namespace.
We are going to create a YAML configuration file with the Deployment details, we'll name it webserver.yaml
apiVersion: apps/v1
kind: Deployment
metadata:
  name: webserver
  labels:
    app: nginx
spec:
  replicas: 3
  selector:
    matchLabels:
      app: nginx
  template:
    metadata:
      labels:
        app: nginx
    spec:
      containers:
      - name: nginx
        image: nginx:alpine
        ports:
        - containerPort: 80
Next we will create the Deployment from this file. Using the -f option we can pass a file as an object's specification.
$ kubectl create -f webserver.yaml
deployment.apps/webserver created
List ReplicaSets and Pods
$ kubectl get rs
NAME                   DESIRED   CURRENT   READY   AGE
webserver-7fb7fd49b4   3         3         3       51s

$ kubectl get pods
NAME                         READY   STATUS    RESTARTS   AGE
webserver-7fb7fd49b4-5csv6   1/1     Running   0          64s
webserver-7fb7fd49b4-89d5l   1/1     Running   0          65s
webserver-7fb7fd49b4-l9ttt   1/1     Running   0          64s
Exposing an Application
We have explored the different ServiceTypes, with it we can define the access method for a Service. If we connect to that port from any node, we are proxied to the ClusterIP of the Service. Let us create a NodePort ServiceType.
We create a webserver-svc.yaml.
apiVersion: v1
kind: Service
metadata:
  name: web-service
  labels:
    run: web-service
spec:
  type: NodePort
  ports:
  - port: 80
    protocol: TCP
  selector:
    app: nginx
We will create the service object.
$ kubectl create -f webserver-svc.yaml
service/web-service created
We are also given a more direct method of creating a Service by exposing the previously created Deployment
$ kubectl expose deployment webserver --name=web-service --type=NodePort
service/web-service exposed
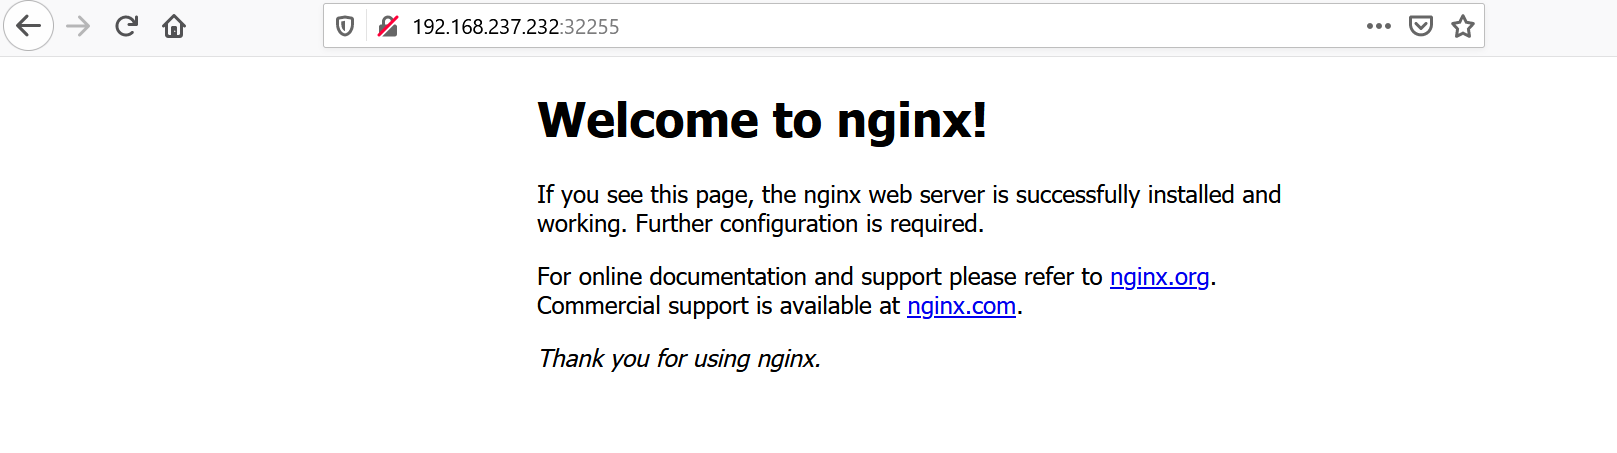
We can list the services, and see its ClusterIP with a mapping of 80:32255 in the Ports section, which means that we have reserved a static port 32255 on the node.
$ kubectl get svc
NAME          TYPE        CLUSTER-IP      EXTERNAL-IP   PORT(S)        AGE
kubernetes    ClusterIP   10.96.0.1       <none>        443/TCP        36m
web-service   NodePort    10.100.112.57   <none>        80:32255/TCP   2m19s
To get more details about the Service, we are going to describe it.
$ kubectl get svc web-service
Name:                     web-service
Namespace:                default
Labels:                   run=web-service
Annotations:              <none>
Selector:                 app=nginx
Type:                     NodePort
IP Families:              <none>
IP:                       10.100.112.57
IPs:                      <none>
Port:                     <unset>  80/TCP
TargetPort:               80/TCP
NodePort:                 <unset>  32255/TCP
Endpoints:                172.17.0.5:80,172.17.0.6:80,172.17.0.7:80
Session Affinity:         None
External Traffic Policy:  Cluster
Events:                   <none>
We can see that the service is using app=nginx as a Selector to logicall group our three Pods, which are listed as endpoints in the Endpoints section.
Accessing an Application
First lets examine the ip of our minikube cluster
$ minikube ip
192.168.237.232
We should now be able to access our nginx server with this ip and the port listed by using the kubectl get svc command.
Liveness and Readiness Probes
At times, our applications may become unresponsive or may be delayed during startup. Implementing Liveness and Readiness Probes allows the kubelet to control the health of the application running inside a Pod's container and force a container restart of an unresponsive application. It is recommended to allow enough time for the Readiness Probe to possibly fail a few times before a pass, and only then check the Liveness Probe, otherwise we may be stuck in an infinite re-create - fail loop, because the container might never reach the ready state.
Liveness Probes can be set by defining a Liveness command, a Liveness HTTP request, or a TCP Liveness probe.
They are useful if an application gets into an deadlock or crashes unexpectedly. In such case the container is no longer useful to us and we would restart the container to make the application available again.
In the example, the liveliness command is checking the existense of a file /tmp/healthy.
apiVersion: v1
kind: Pod
metadata:
  labels:
    test: liveness
  name: liveness-exec
spec:
  containers:
  - name: liveness
    image: k8s.gcr.io/busybox
    args:
    - /bin/sh
    - -c
    - touch /tmp/healthy; sleep 30; rm -rf /tmp/healthy; sleep 600
    livenessProbe:
      exec:
        command:
        - cat
        - /tmp/healthy
      initialDelaySeconds: 3
      failureThreshold: 1
      periodSeconds: 5
The existence of the /tmp/healthy file is configured to be checked every 5 seconds using the periodSeconds parameter. The initialDelaySeconds parameter requests the kubelet to wait for 3 seconds before the first probe. When running the command line argument to the container, we will first create the /tmp/healthy file, and then we will remove it after 30 seconds. The removal of the file would trigger a probe failure, while the failureThreshold parameter set to 1 instructs kubelet to declare the container unhealthy after a single probe failure and trigger a container restart as a result.
After 30 seconds we will describe the Pod, and observe the Events section of it.
$ kubectl describe pod liveness-exec
Events:
  Type     Reason     Age   From               Message
  ----     ------     ----  ----               -------
  Normal   Scheduled  63s   default-scheduler  Successfully assigned default/liveness-exec to minikube
  Normal   Pulling    63s   kubelet            Pulling image "k8s.gcr.io/busybox"
  Normal   Pulled     62s   kubelet            Successfully pulled image "k8s.gcr.io/busybox" in 1.147125841s
  Normal   Created    62s   kubelet            Created container liveness
  Normal   Started    61s   kubelet            Started container liveness
  Warning  Unhealthy  28s   kubelet            Liveness probe failed: cat: can't open '/tmp/healthy': No such file or directory
  Normal   Killing    28s   kubelet            Container liveness failed liveness probe, will be restarted
  Normal   Pulling    28s (x3 over 2m38s)  kubelet            Pulling image "k8s.gcr.io/busybox"
  Normal   Created    27s (x3 over 2m37s)  kubelet            Created container liveness
  Normal   Started    27s (x3 over 2m36s)  kubelet            Started container liveness
  Normal   Pulled     27s                  kubelet            Successfully pulled image "k8s.gcr.io/busybox" in 566.481414ms
We can see that at one point the Liveness probe failed while it couldn't resolve the cat command on the /tmp/healthy file. After that failed check, the container will be created again.
In the following example the kubelet sends the HTTP GET request to the /healthz endpoint of the application. If it returns a failure, the kubelet will restart the affected container.
apiVersion: v1
kind: Pod
metadata:
  labels:
    test: liveness
  name: liveness-http
spec:
  containers:
  - name: liveness
    image: k8s.gcr.io/liveness
    args:
    - /server
    livenessProbe:
      httpGet:
        path: /healthz
        port: 8080
        httpHeaders:
        - name: Custom-Header
          value: Awesome
      initialDelaySeconds: 3
      periodSeconds: 3
With the TCP Liveness Probe, the kubelet attempts to open the TCP Socket to the container, which is running the application, if it doesn't succeed the kubelet will mark it unhealthy and restarts the affected container.
apiVersion: v1
kind: Pod
metadata:
  name: goproxy
  labels:
    app: goproxy
spec:
  containers:
  - name: goproxy
    image: k8s.gcr.io/goproxy:0.1
    ports:
    - containerPort: 8080
    readinessProbe:
      tcpSocket:
        port: 8080
      initialDelaySeconds: 5
      periodSeconds: 10
    livenessProbe:
      tcpSocket:
        port: 8080
      initialDelaySeconds: 15
      periodSeconds: 20
After 15 seconds, view Pod events to verfy that liveness probes.
$ kubectl describe pod goproxy
Readiness Probes
Sometimes the applications must meet certain conditions before they are ready to serve traffic. This might include that the depending service is ready or acknowledging that a large data-set needs to be loaded. In such cases, we use Readiness Probes. They are configured similarly to Liveness Probes and their configuration remains the same.